• GALLERY
  • BLOG
  • VIDEOS
  • ABOUT
  • CONTACT
  • RESUME

Diane Savona

  • GALLERY
  • BLOG
  • VIDEOS
  • ABOUT
  • CONTACT
  • RESUME

Kiosk 2015 (part 3)

My wealthier friends take their art to a professional photographer, and they get great results. But I've always been a low-cost production, so I learned to do the photography myself. This involved a lot of mistakes and a great deal of cursing. Early on, I learned that doing it outside, on overcast days, was my best bet. Then I discovered that on the side of the house, between 11am and 1pm, the sun reflected nicely off the house next door, creating a reasonably diffuse light. So I built a permanent stand out there, and I attach either a white or black cloth when I shoot.

Usually, I can just take the resulting jpegs, download them onto my computer, crop out the leaves, photoshop out the wrinkles and it's all good. But kiosk is so large that it's perhaps visually confusing..? After it was rejected by a few shows, I reworked the image:

Take photo of empty corner, add art, and yes! It was accepted in a show, and shown in the Buddy Warren Gallery in NYC. Here are a few photos taken in that gallery:

The concave dots below were sewn on a printed image of old typewriter keys; the square indents are an image of a computer keyboard. The T-shirt pocket that reads 'your birthday/  favorite food' is one of several pockets with suggested reminders of your password. 

One last picture. In the first kiosk posting, I wrote about the Morris columns, and kiosks and Roman commemorative columns that inspired this piece. I told photos of them, printed them out on cloth and added them to the column, as small badges of respect to the source.

tags: 2015, kiosk, photography, homage to the source
Thursday 06.22.17
Posted by Diane Savona
 

Kiosk 2015 (part 2)

How to assemble 32 pieces into one coherent composition? In the early days, I would have spent many hours pinning pieces to my work wall; looking, taking them down and re-pinning. Now I use Photoshop (photoshop elements, for non-techies like me). I take pictures of each piece....

..by laying them down on the floor, with yardsticks so I can keep sizes consistent. Then I combine all the pictures on one big jpeg.

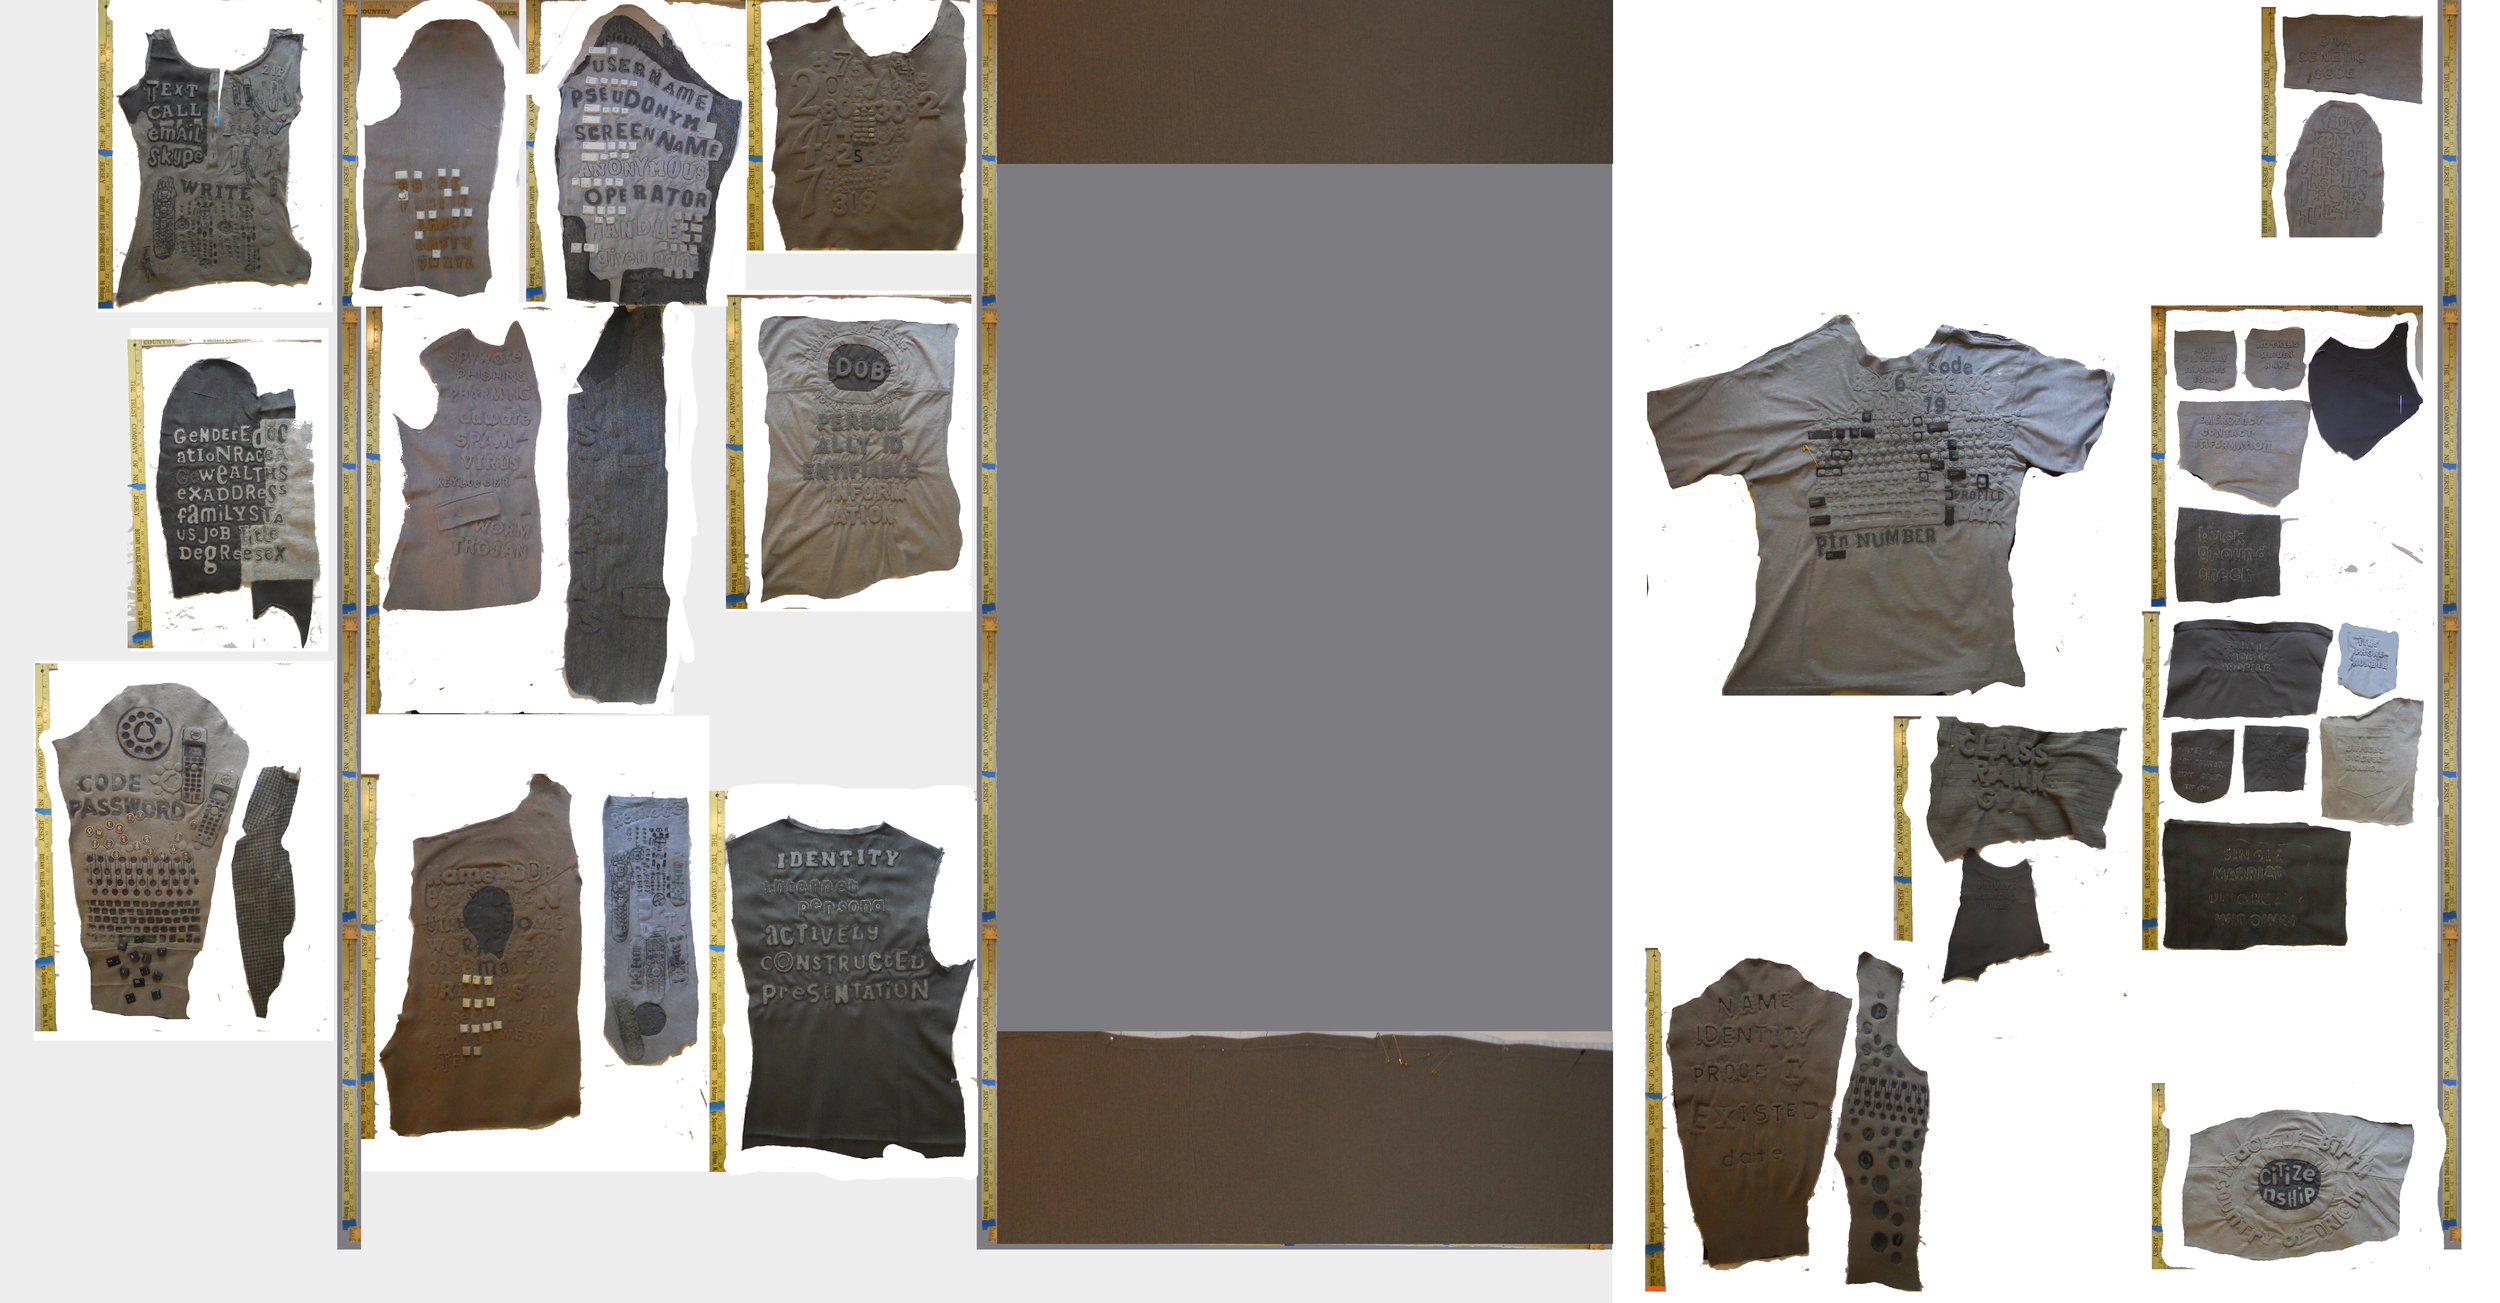
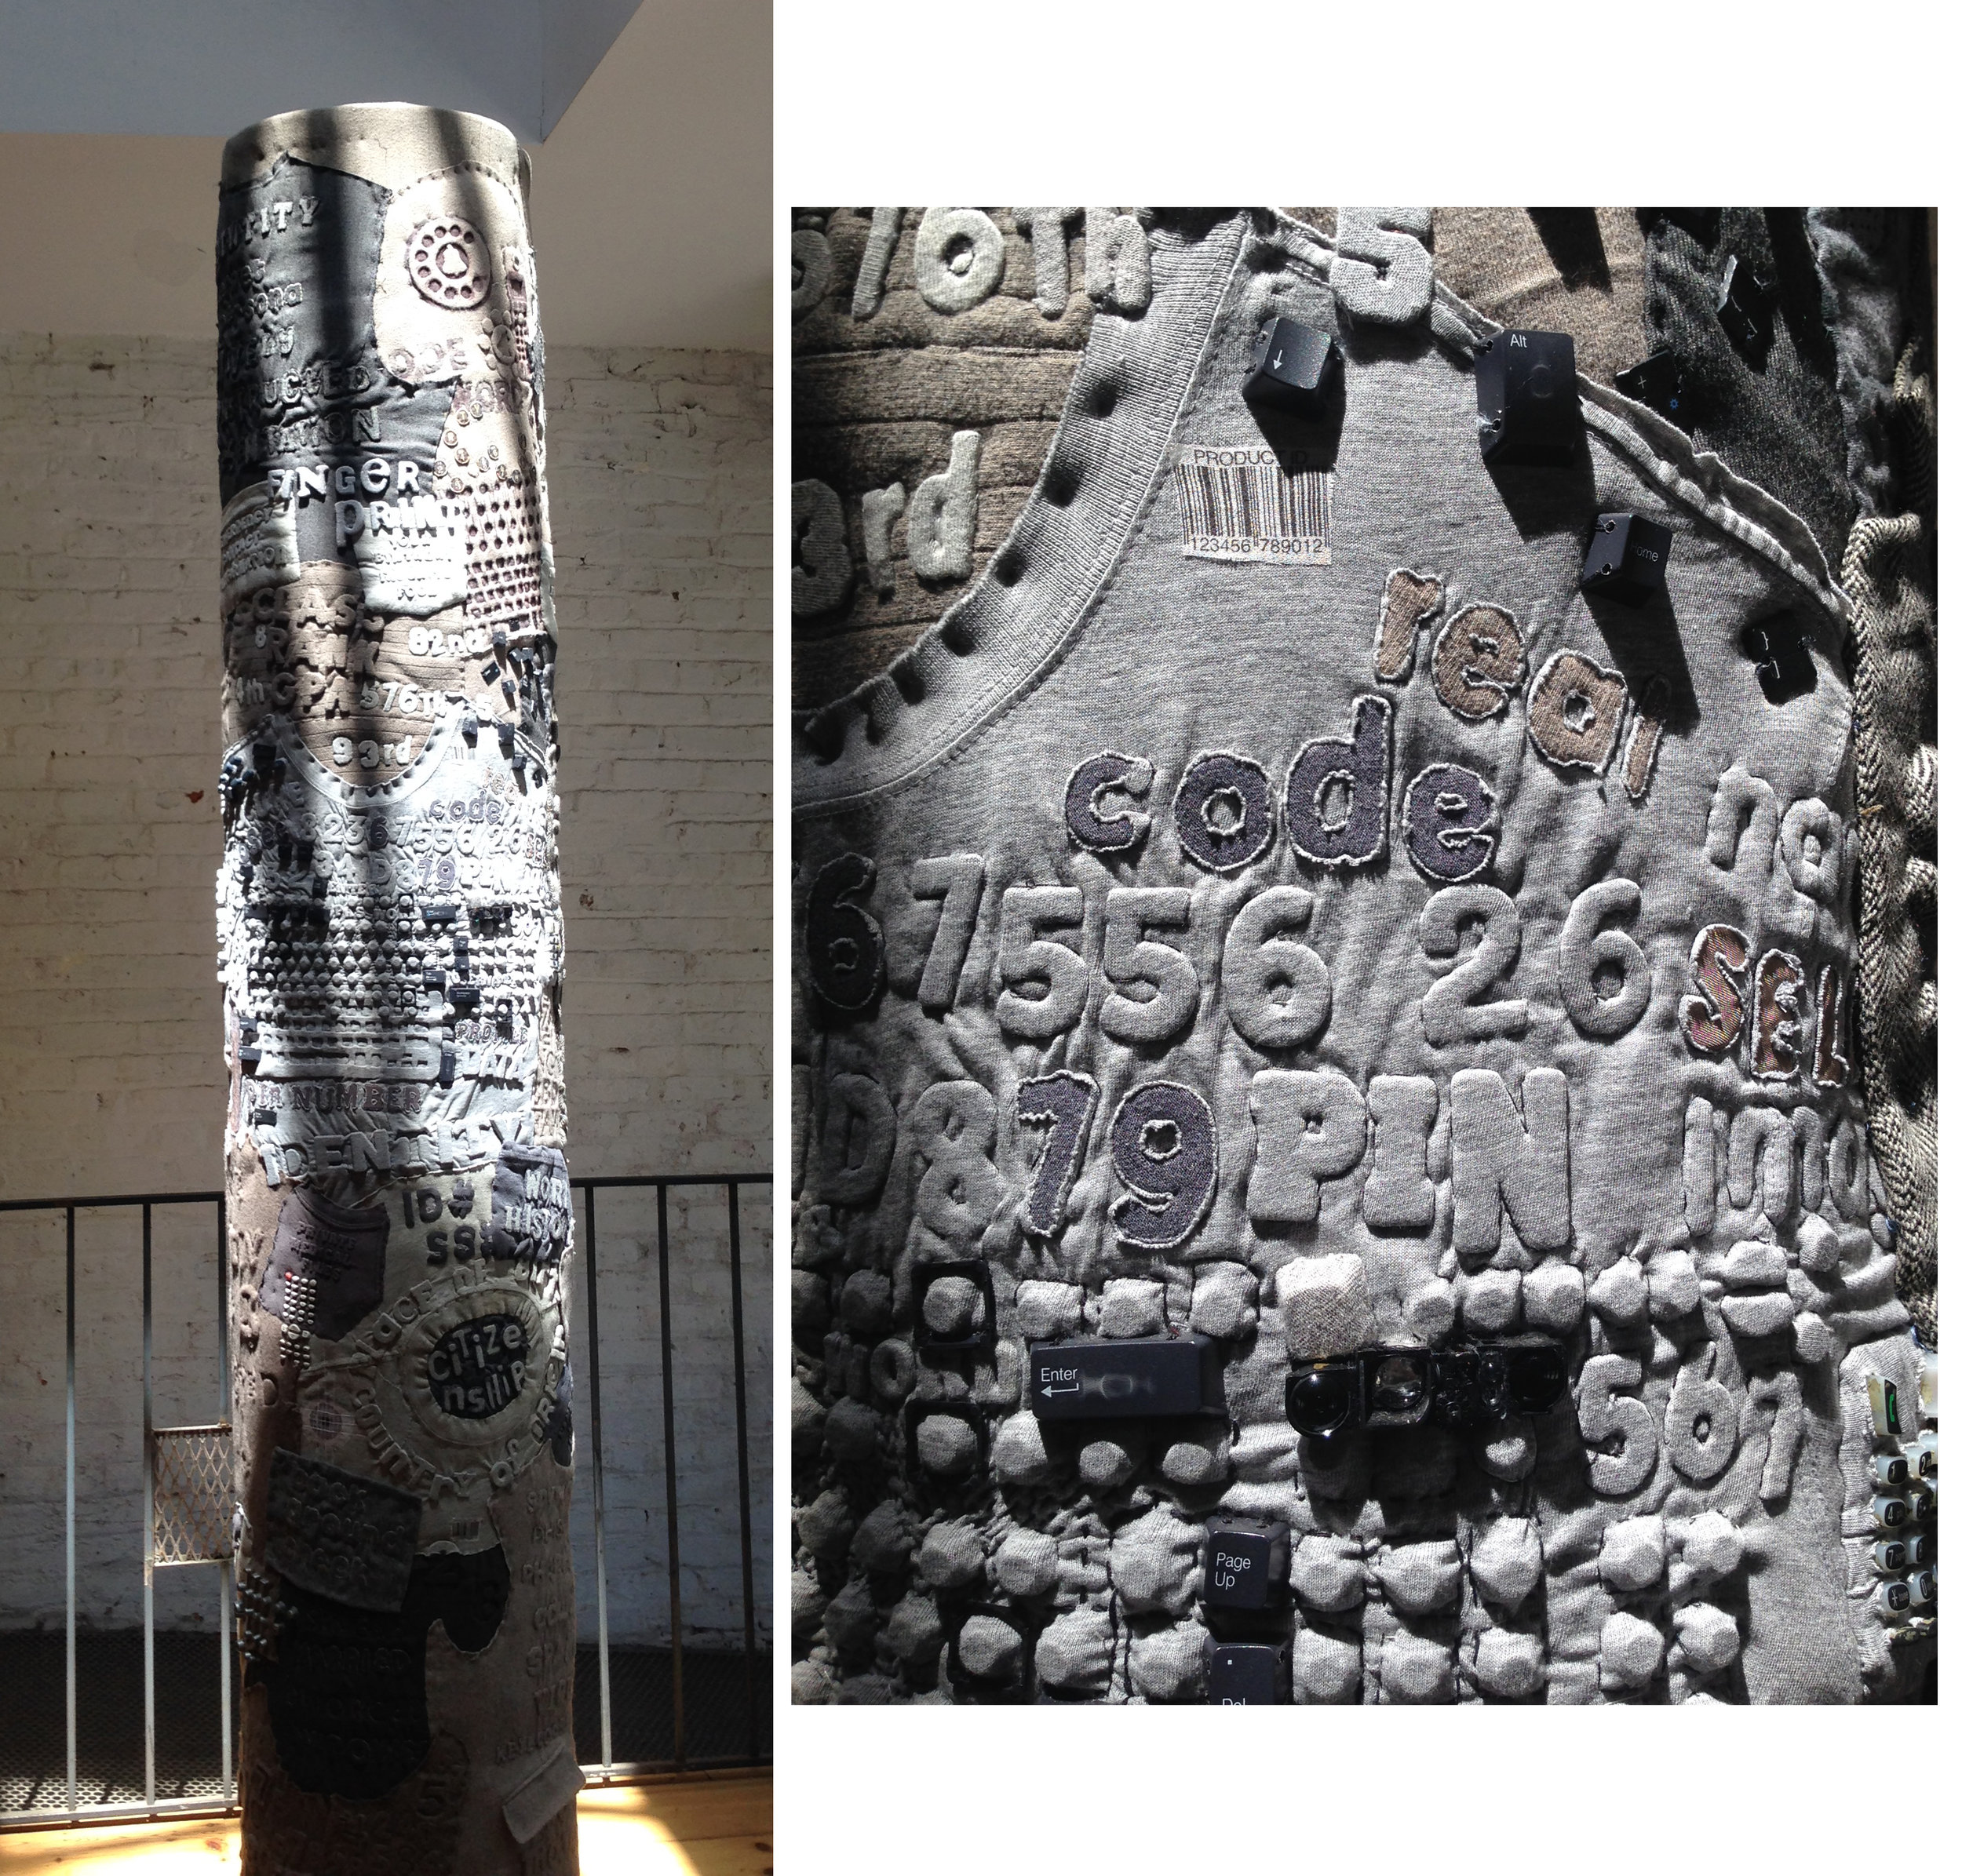
I can easily move each section around until I have the composition I want. The big grayish section in the center represents the area of the column (8' x 4') - I move pieces onto that.

I print out the image and I gave a composition plan to follow.

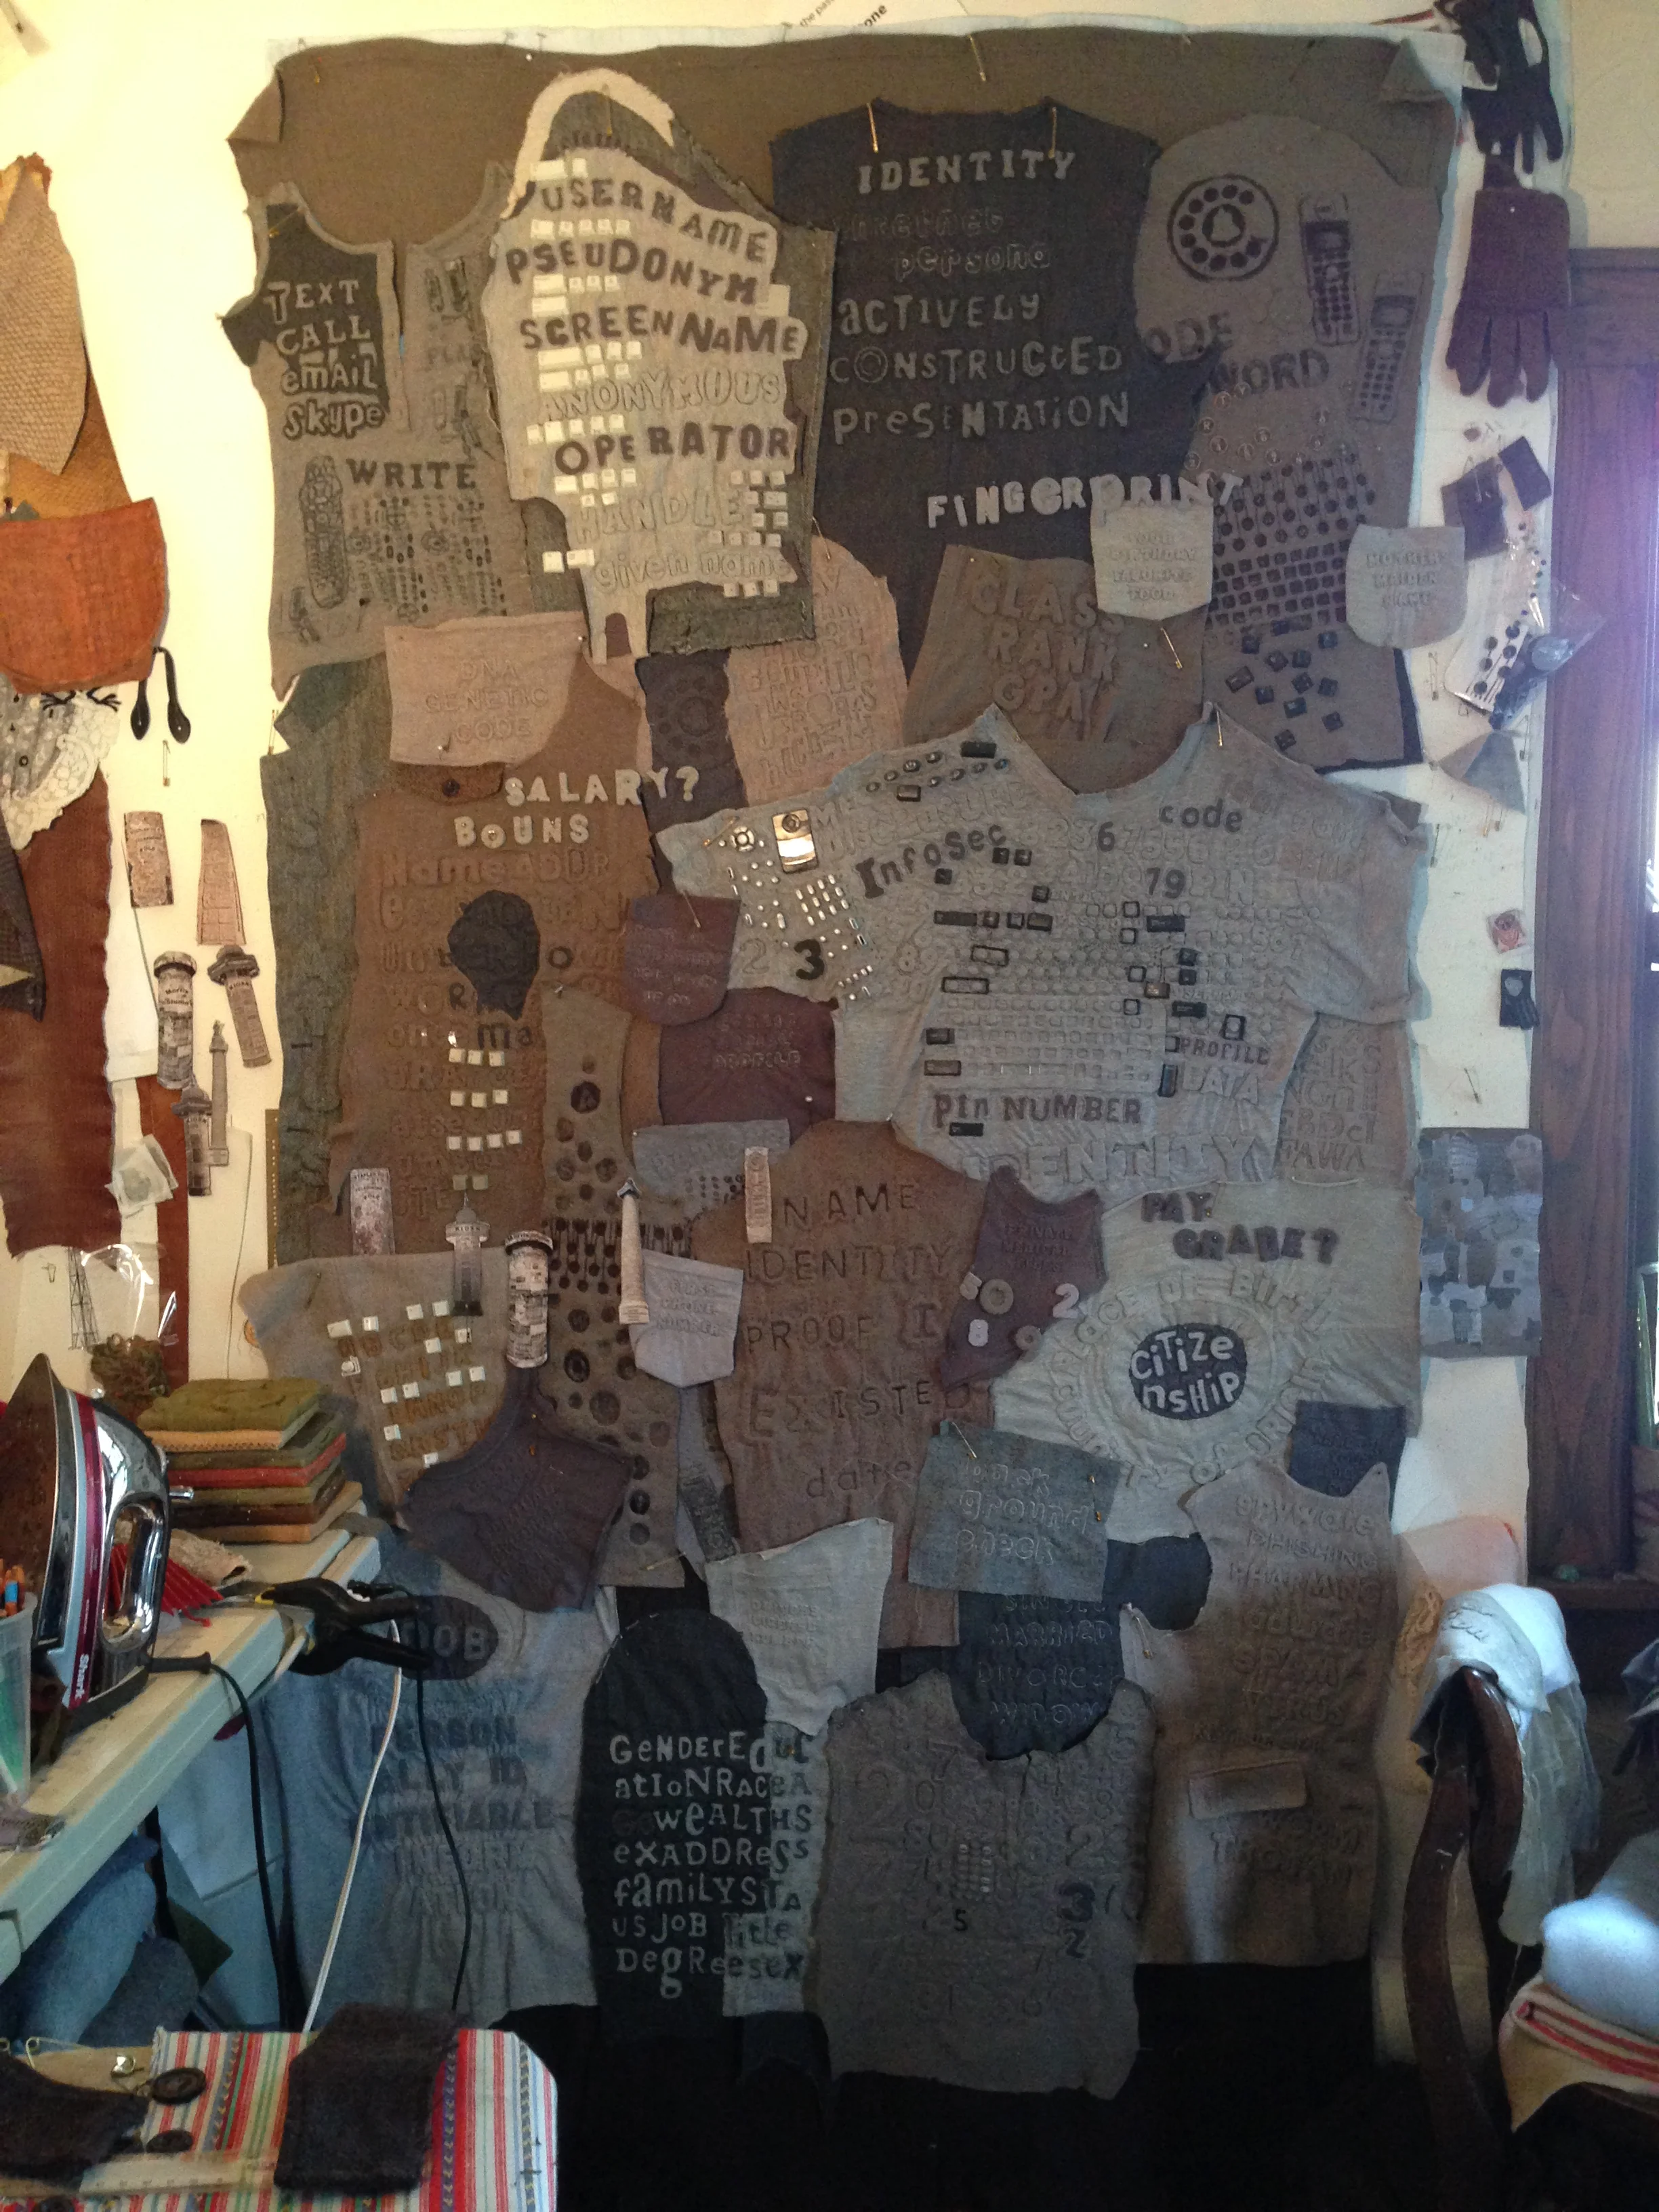
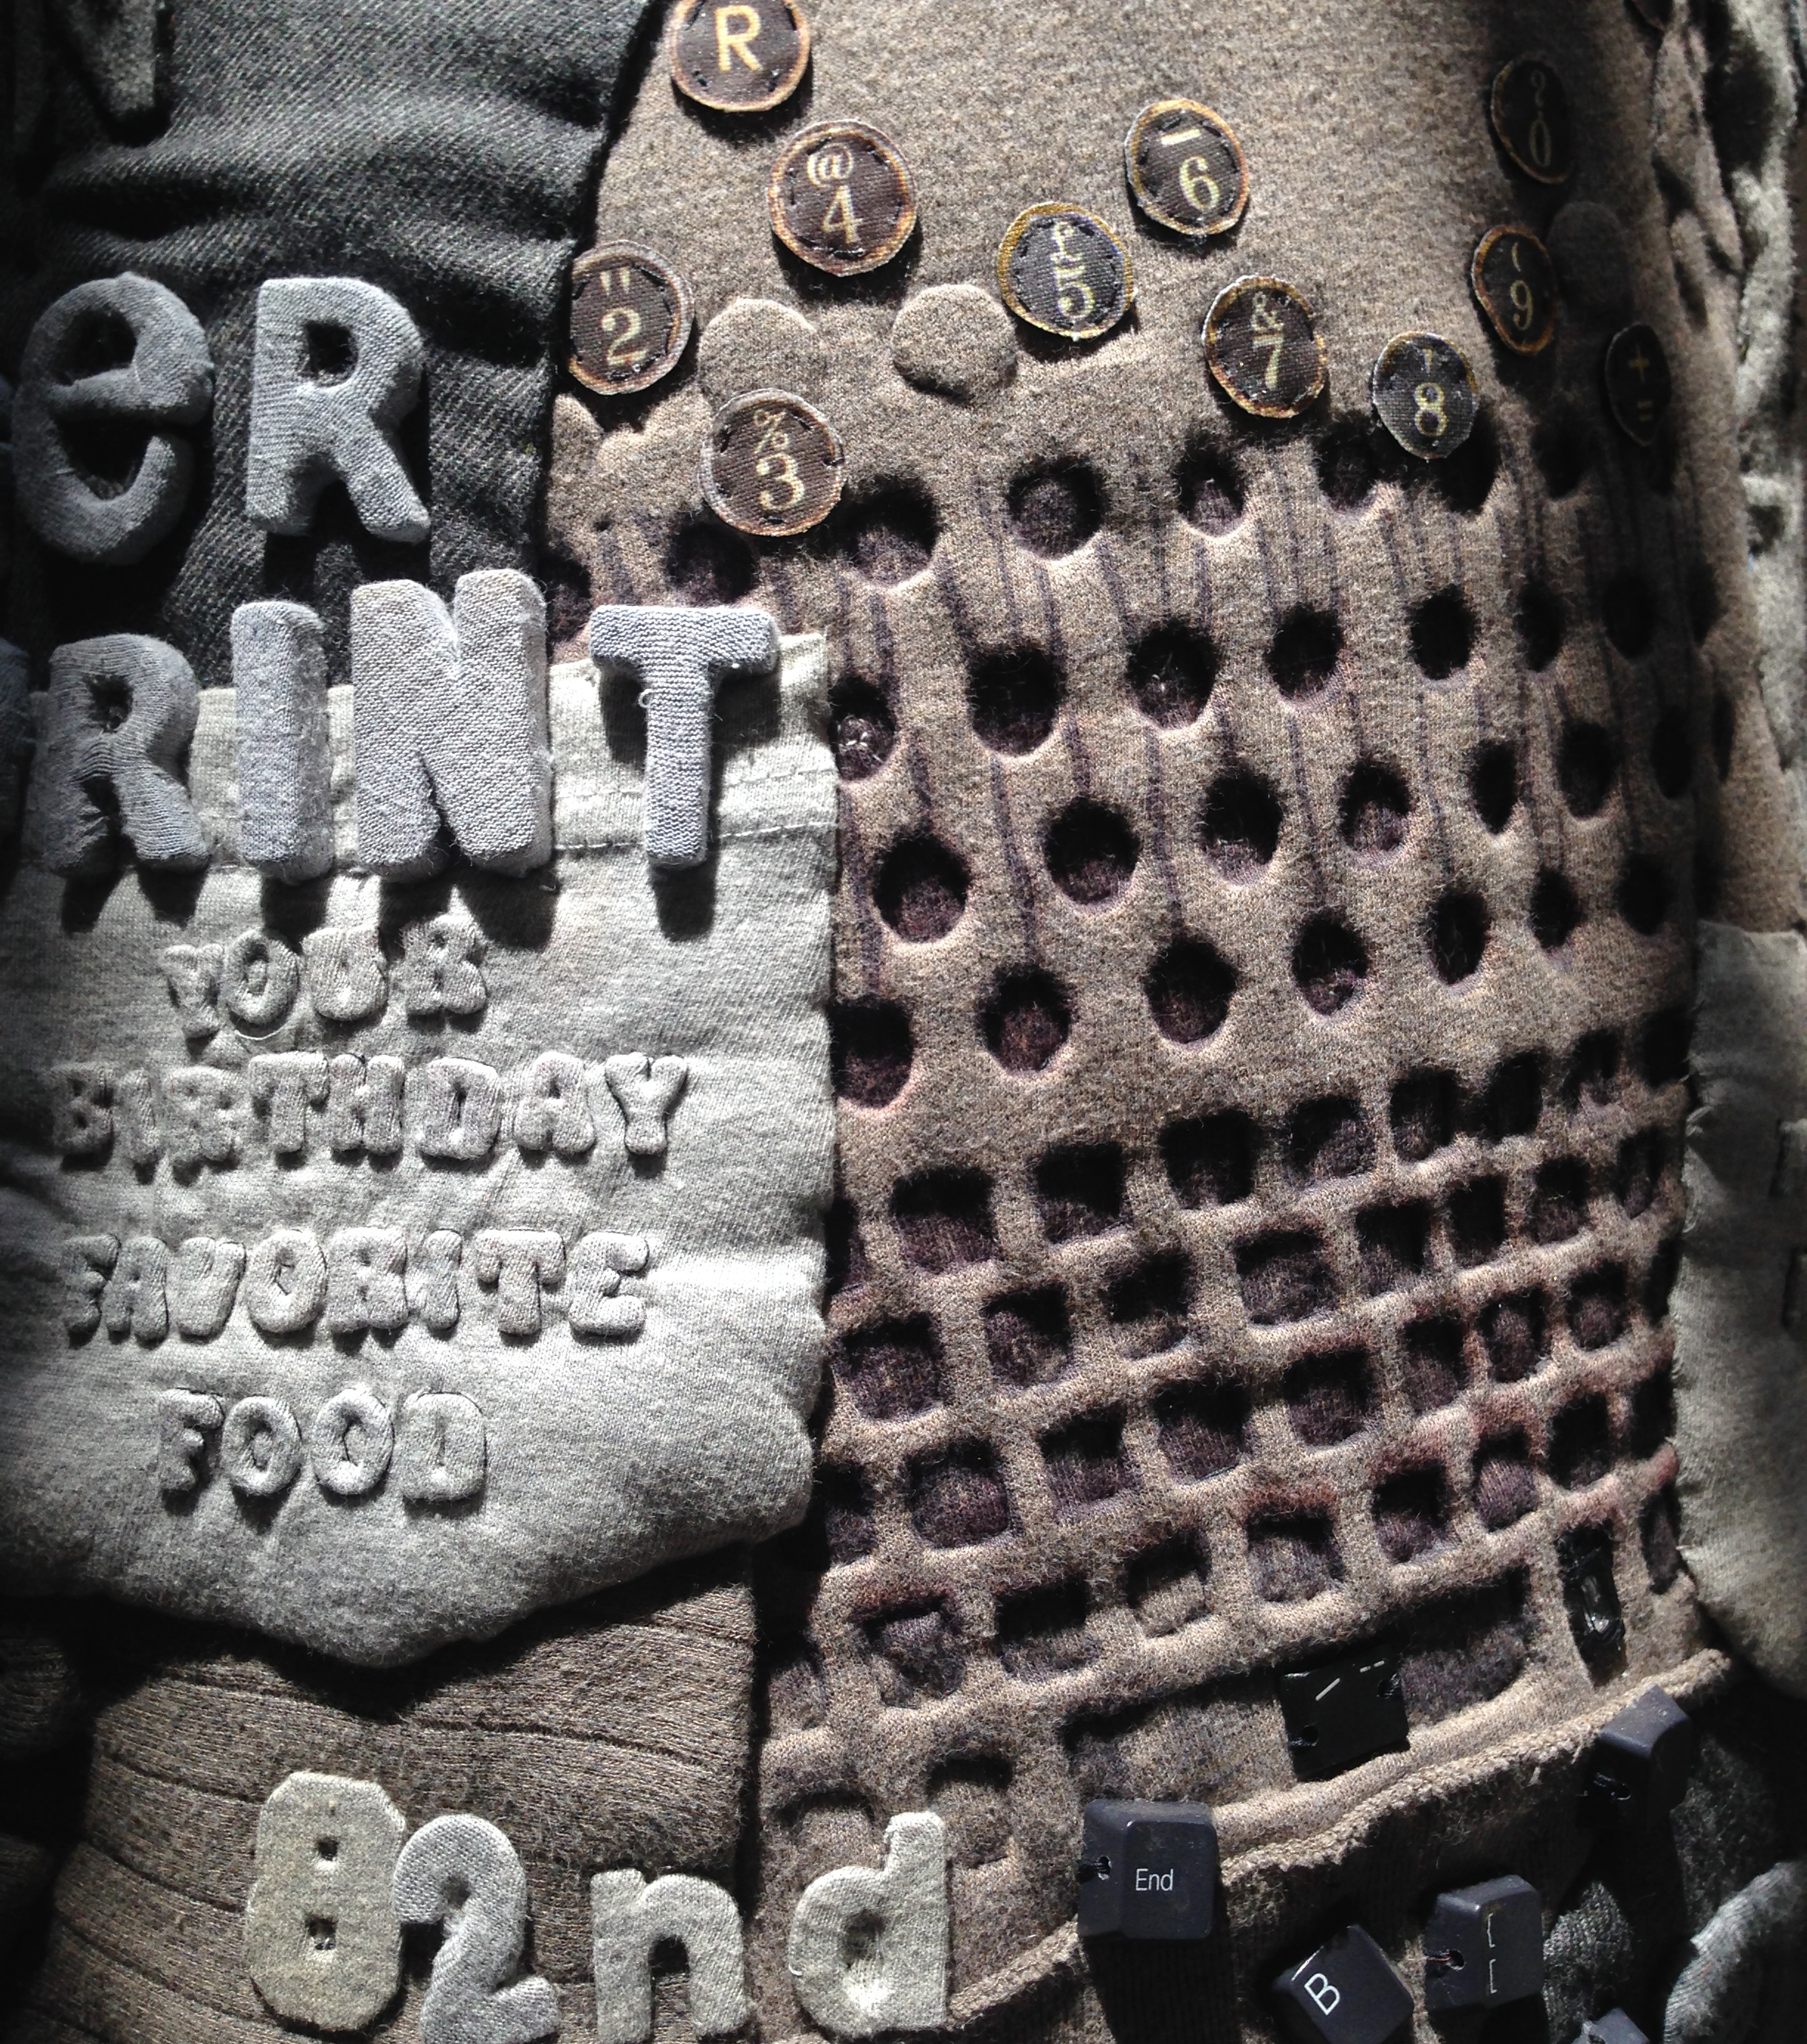
All the pieces get pinned exactly where they should go, on a woolen backing, and sewn together. 

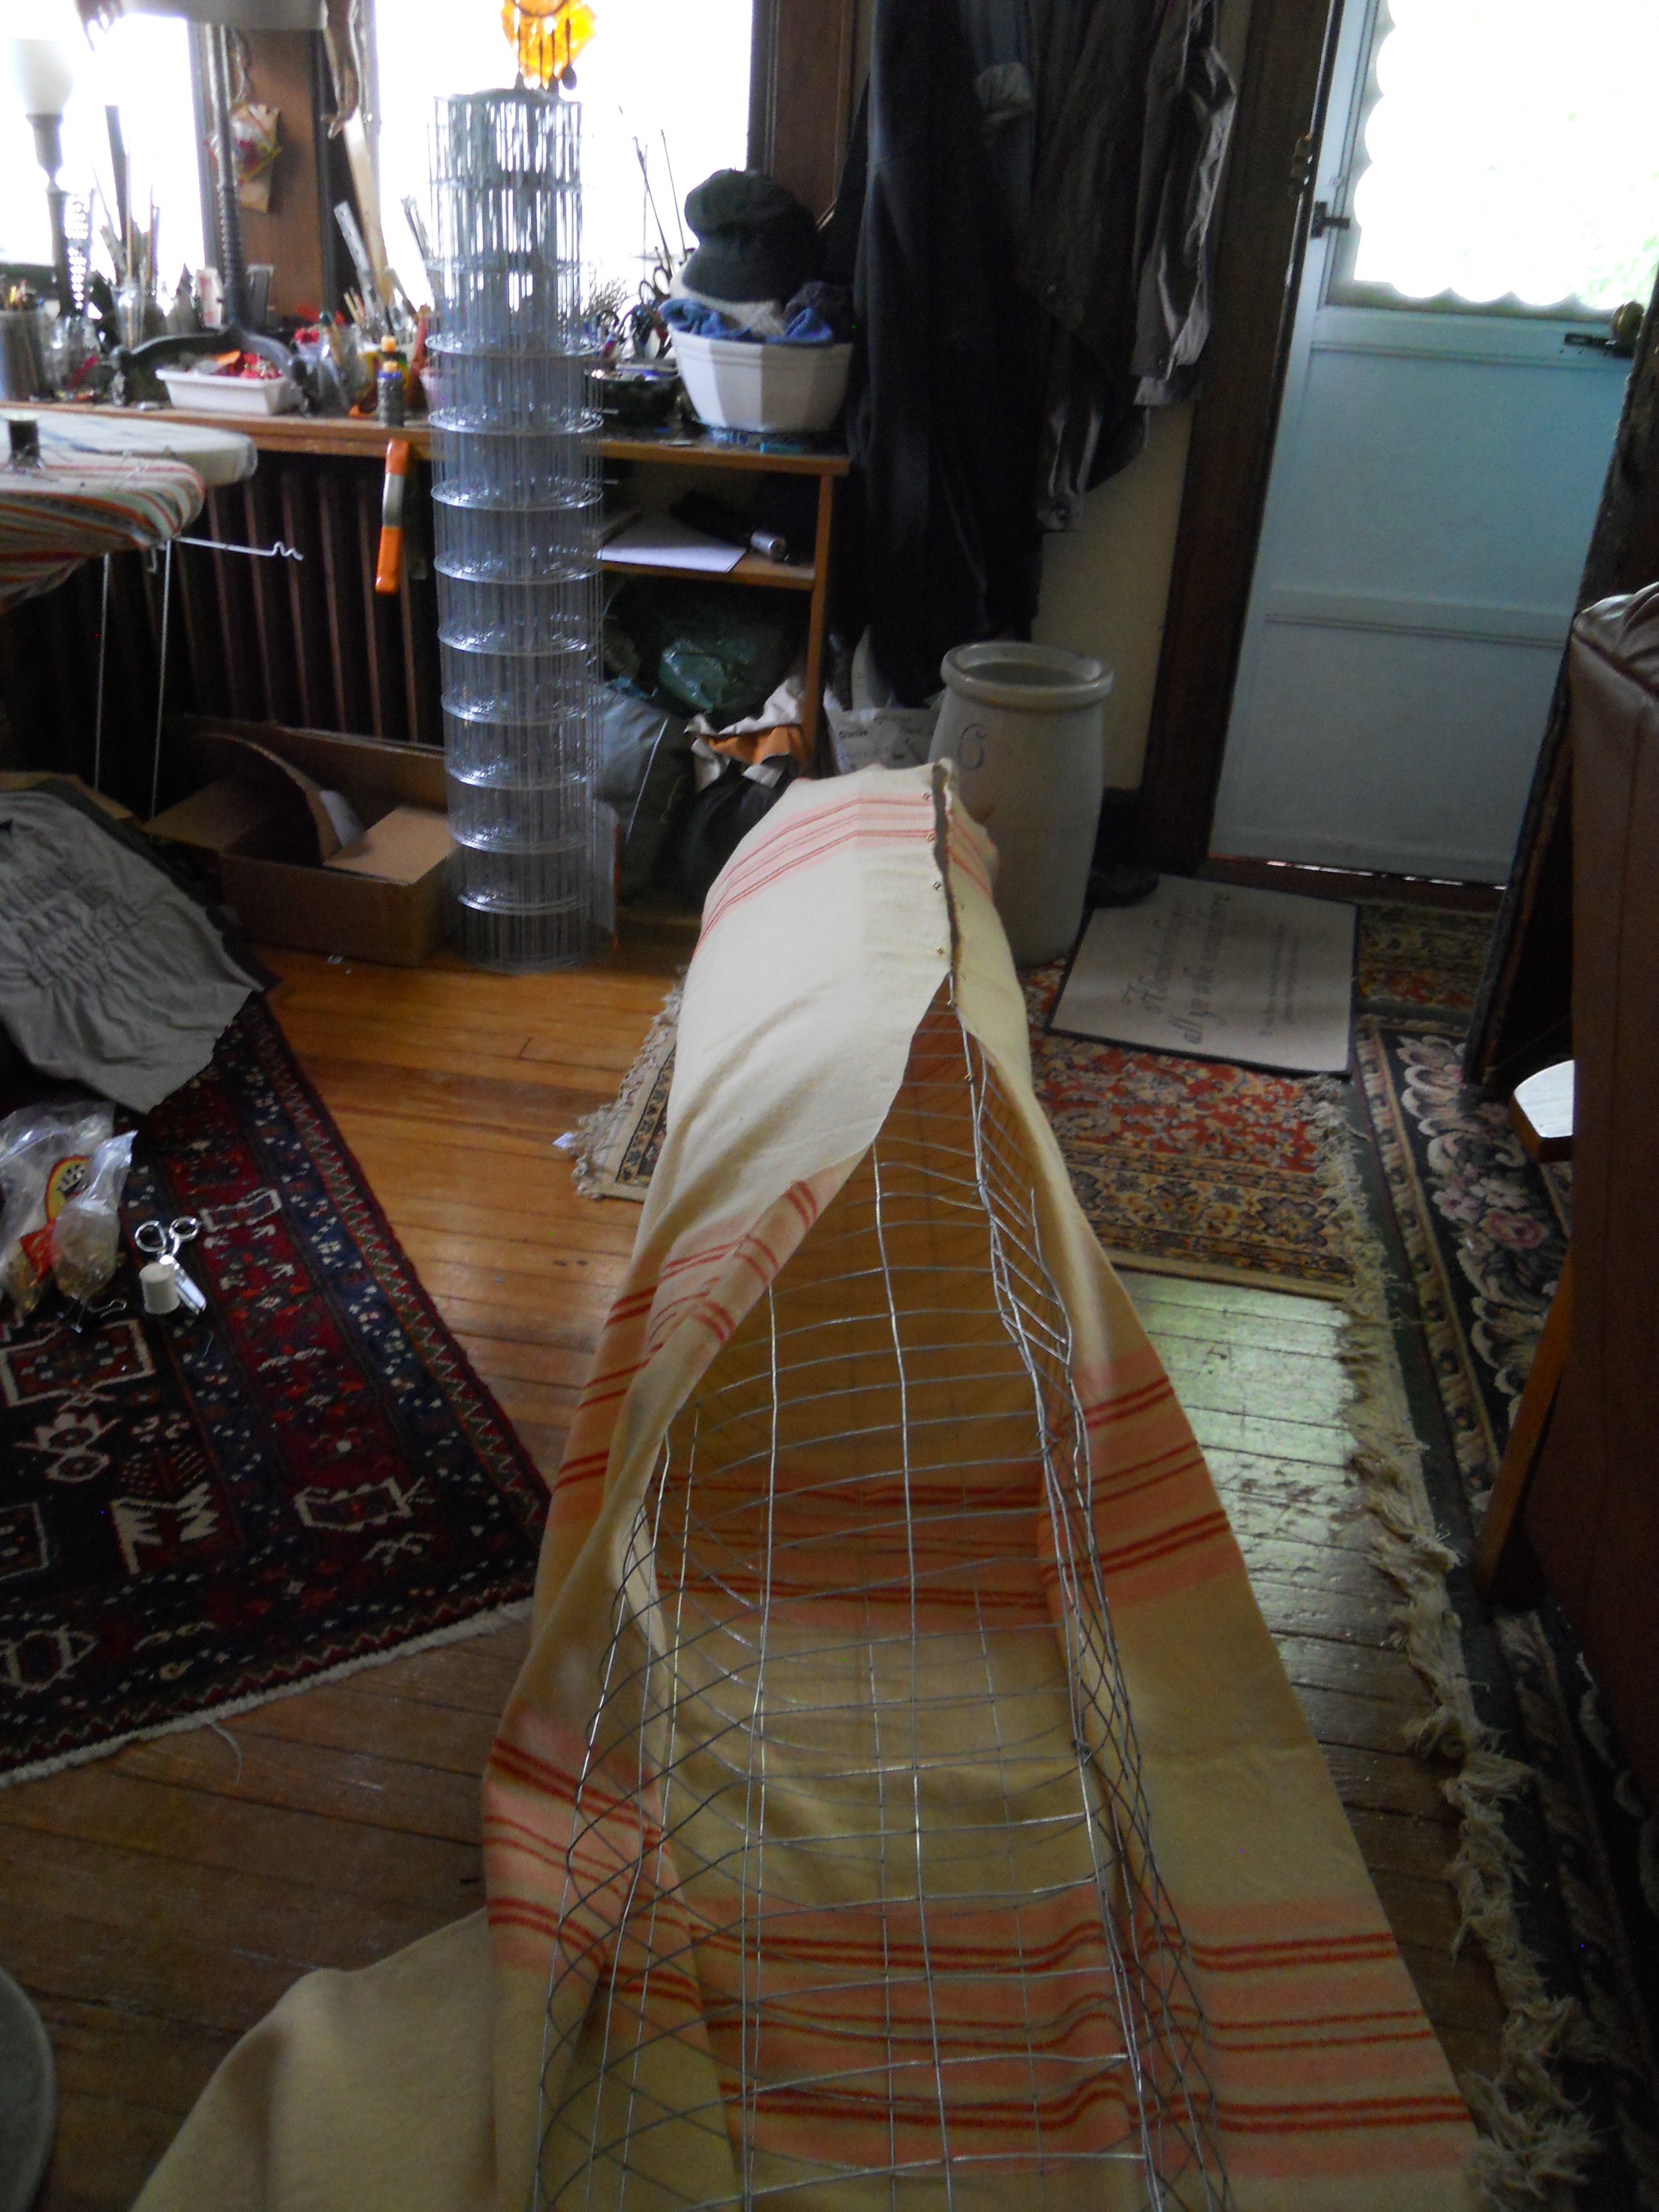
Meanwhile, I've been fighting with a heavy roll of fencing material. Here, the framework is ready and about to be encased in an old blanket. The assembled composition is sewn over the blanket layer, and I have my column.

Part 3 will cover photographing this monster.

.

tags: 2015, kiosk, techniques
Wednesday 06.21.17
Posted by Diane Savona
 
Newer / Older

Sign up for news from Diane!

Thank you!