• GALLERY
  • BLOG
  • VIDEOS
  • ABOUT
  • CONTACT
  • RESUME

Diane Savona

  • GALLERY
  • BLOG
  • VIDEOS
  • ABOUT
  • CONTACT
  • RESUME

the goddess mannequin

Despite the wet, messy failures, this really is addictively great fun. After the 3 successful sleeve pieces, I was again ready to try something larger.

1 blog.jpg

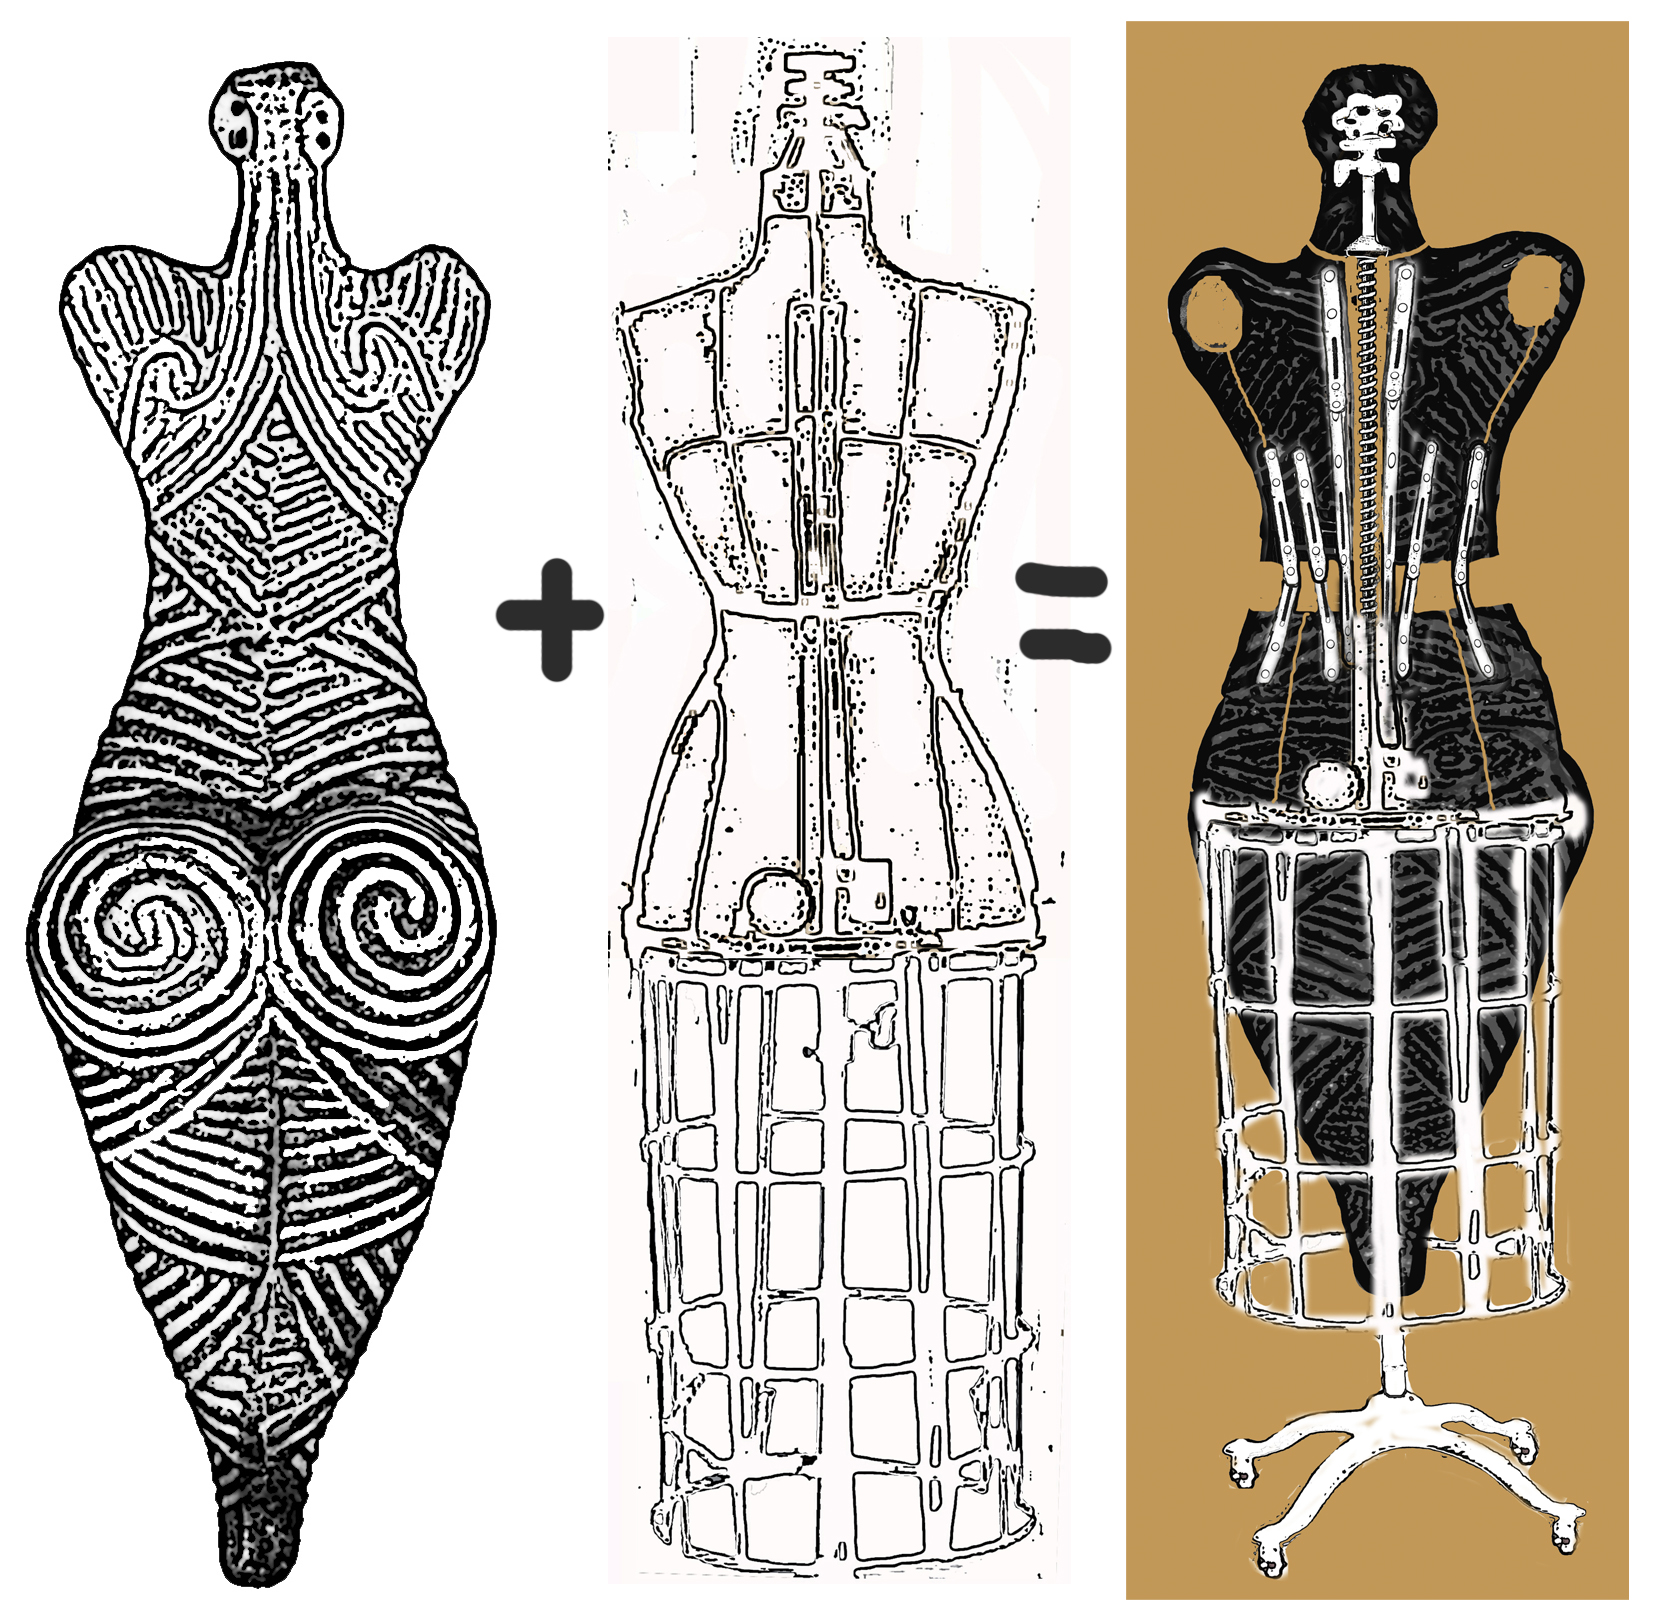
This operator figure is a composite of 2 different figures. Together, as a black silhouette, it reminded me of the ancient Paleolithic Venus figures. (click on this link for more info on these figures)  https://en.wikipedia.org/wiki/Venus_figurines  So I started collecting and playing around with them:

2 venus figures blog.jpg

The Cucuteni figure, from Romania (far right) has great patterns. Maybe she could work with a dress mannequin?

3 venus figures blog 2.jpg

Sure, I could just cut out a nice black shape and boil it over the paper mannequin. But...

blog venus.JPG

If I sew black wool strips onto a dark gray woolen shape, then I can boil the patterns in my print. And I want a more detailed mannequin.

blog 4.jpg

This is an old one that I got when the NY Metropolitan Opera was selling off some of their stock. It's a really complex mechanism, allowing for all sorts of size modifications.  

blog 5.jpg

This is a photo I took inside the mannequin (by shooting through the other armhole). Look at all the wingnuts, holding it together. On the right side is my spring pole design.

aa Venus mannequin TOP HALF frame.jpg

I printed out the bottom of the mannequin in one piece, but for the top, I printed the sections  to assemble on the wool.

IMG_9040vv.jpg

An explanation of this convoluted image: The black and gray venus layer is on the right. I traced her onto the white wool, giving me an outline shape to work with. Then I arranged, ironed and basted the paper resists, and stitched around them with dark red thread. Now - the brown parts. The section in the center (covering the spring pole) and the 2 strange spoon-shaped sections: this brown wool is the same wool that will be used as the background. By adding pieces here (UNDER the black and gray wool) it will come out looking empty.

still with me?

OK, add the black/gray sections, cover with the brown wool (from that ugly brown coat I showed you a while back), soak, wrap, into the oven....

IMG_9042.JPG

Oh joy: a couple of brand new problems: part of the top section apparently got folded under and didn't absorb any color; large sections of the bottom half just refused to accept the color (WHY??) and somehow the dark color transfer LEAKED out on the right side. But, basically, it looks good, and since I showed great restraint and only removed the black/gray shape, leaving all the resist right there on the wool, I can easily re-boil it. Which I'll do tomorrow, with a fresh mind.

IMG_9052.JPG

So.... I basted some additional  gray wool over some of the dark sections, to correct the place where the black/gray was too light. Then I covered all the dark sections with resist paper to keep them from any additional color transfer. I cut off a strip to use as a patch over the dark leak. Then I took the same dark brown wool, reversed it, and back in the oven. The picture (above) is what came out after the second boil.

And now I can take off the resists.

IMG_9054.JPG
IMG_9055.JPG

Oh yeah....the reasonably subtle black/gray pattern, great contrast, so very nice when it all works.

IMG_9057 double.jpg

On the left, both sections on a towel, still damp. On the right, with an arrangement of the brown wool as a background, with the black/gray sections on the sides.  We have a winner!

Any comments or criticisms you'd like to share? email me at dianesavona@aol.com

Saturday 06.02.18
Posted by Diane Savona
Newer / Older

Sign up for news from Diane!

Thank you!